

Do it Yourself Installation Tips
The installation process for different types of hardwood floors is very similar for the most part but there are a few extra steps that can help to guarantee a flawless install every time. Let’s review everything you need to know about installing a hardwood floor before you even lay your first plank.
It all comes down to one easy to remember acronym P.A.C.E. which is CALI’s four-step formula for success.
P.A.C.E. stands for:
- Preparing the Subfloor
- Acclimation
- Controlling the Environment
- Expansion Spaces
By following the installation tips within P.A.C.E., you can’t go wrong so let’s get started with preparing your subfloor prior to installation.
Preparing the Subfloor before Installation
With any kind of hardwood floor installation the subfloor needs to be clean, dry, level, and structurally sound. To help smooth out any imperfections, and add comfort, you can add underlayment beneath your hardwood flooring.
Point out and fix any signs of excessive moisture. You’re going to want to get a moisture reading of your subfloor by using either a moisture meter or a calcium chloride test.
The moisture barrier to use will depend on the subfloor moisture content. When floating a floor with moisture readings below 12% on plywood, use Cali Complete underlayment.
For concrete subfloors with moisture readings under 12 pounds per thousand square feet, use Cali Complete with the metalized seal tape.
If your slab is over 12 pounds per thousand square feet use Titebond 531+ .This concrete moisture barrier has no moisture limit and can be used for any installation method. It’s fast easy to apply and you simply roll it onto the floor like paint and it dries within hours of application.
Acclimating Your Hardwood Flooring
Proper acclimation is a true key to a successful installation. The ultimate goal of acclimation is to equalize the flooring’s moisture content with the customer’s home environment prior to installation. Before you install any flooring, you want to measure the temperature and humidity levels of the home using a simple hygrometer. Every homeowner likes a different climate in their home. Whether they like to blast their AC leave their windows open year-round the key is to make sure they acclimate their flooring to their normal living conditions. First, you want to remove the planks from the cartons. Then you’ll want a sticker stack them on two by fours or a pallet as close to the installation area as possible. While you’re sticker stacking, it’s a great idea to pull planks from several cartons at a time mixing cartons when you stack, in order to create natural color variation when the flooring is installed. Next, allow the stack to acclimate for five days. For extremely dry or humid climates two more weeks may be necessary for acclamation. Moisture testing the planks is the best way to confirm when this process is complete. You can reference the CALI installation guidelines for more information about ideal values.
Controlling the Environment
After acclimation is complete try to keep the home’s relative humidity and temperature as close to the acclamation conditions as possible. If they vary more than 20%, the use of a humidifier or dehumidifier may be necessary. It’s a good idea to not turn off climate control in the home while on vacation. this will keep condition stable while
out of town.
Expansion Spaces
make sure to provide a 1/2 inch expansion space around all fixed objects. This includes walls, kitchen cabinets, fireplaces and columns. Be sure to undercut all door jams and casings, to allow for appropriate floor movement. If you’re floating the floor, you’re going to want to take special note of how many rooms are on the jobsite. You’re gonna want to use transition pieces such as t-Moldings between each room. If you have a span over 30 feet or working in a home that experiences significant moisture fluctuation, there are many different techniques to add more expansion space such as undercutting drywall combining moldings and more.
Installation Method Tips
A few additional tips for installing your hardwood flooring are specific to the installation method.
Floating Floors
One of the benefits of floating floors is it can be installed over any subfloor, underlayments can be used with floated floors, floating floors are the easiest to install or remove if needed. Click-lock floating floors can be walked on and furniture can be replaced immediately after installation. For floated installations use transition pieces between rooms and spans over 30 feet. Don’t install cabinets or other permanent fixtures on top of or through a floated floor, homeowners should not place heavy objects exceeding 500 pounds on a floated floor.
Glue-Down Installation Method
A few benefits to gluing down a floor is that they can be installed over both concrete and a plywood subfloor. Glue down floors can flow from room to room without the need for transition pieces. Glued down floors can support heavy furniture and objects that exceed 500 pounds. For glue-down installations make sure to use an appropriate flooring adhesive that is compatible with your moisture barrier. For subfloors treated with 531+, we recommend Titebond 821 flooring adhesive.
Nail-Down Installs
Some benefits to nail-down floors are it can be a very fast install. Nailed floors can support heavy furniture and objects exceeding 500 pounds and can be walked on and furniture can be replaced immediately after installation. For nail-down installation, staples will not work. Use an 18-gauge pneumatic flooring nailer such as the Powernail 50P Flex and use 18 gauge cleat nails that are one and a half to two inches long.
Regardless of your installation method, always remember to P.A.C.E. yourselves. When all these steps are followed we have 100% installation success rate. Whenever you’re installing CALI flooring, we’ve got you covered. In addition to all the helpful guidelines videos, how to’s, as well as care and maintenance information available on the site, we have an entire support team dedicated to helping you every step of the way.
Contact CALI’s customer service team at [email protected] or call (858) 200-9540.
Choose Your Installation Method

Floating Click Lock Installation
Click lock flooring requires no gluing at all, simply snap each plank’s click lock system together, great for DIY installers.

Floating T&G Installation
Floating T&G flooring installation requires each planks tongue and groove connector to be glued together.

Nail Down Installation
The Nail Down method is used to secure to the subfloor and offers a fast, and cost efficient way to install a Bamboo Floor.

Glue Down Installation
The Glue Down method is commonly used when installing over concrete that is either on, at or above grade.
Items Mentioned In This Video
More Know-How
Color Matched Trim Finishes the Floor
Finish off your new flooring install with style, choose color-matched flooring trim and accessories that create continuity between rooms and make your space feel bigger.

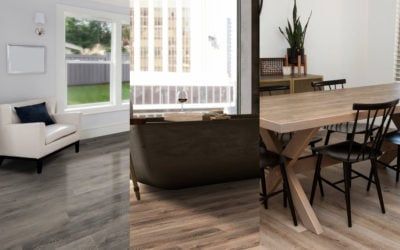
Vinyl Plank Flooring: Pros and Cons
Choosing the right type of flooring can feel overwhelming. After all, you don’t want to make the wrong decision and wind up with floors that don’t suit your needs. That said, we’ll discuss important considerations when researching the pros and cons of...
Choosing Vinyl Plank Flooring
The possibilities are endless, but because you only have so much floor space, we’ve boiled it down to 4 design types with some waterproof Cali Vinyl® Pro options to match. Classic Chocolates Deep, rich, comforting browns bring a sense of coziness to your space. Pair...


